Duckside of the Moon: Survival Game
University Project | Unreal Engine 4, Blueprints | PC & PS5 | 23 people | 16 weeks
Zone Effect Tool · Dialogue Management Tool · Dialogue Camera Transition
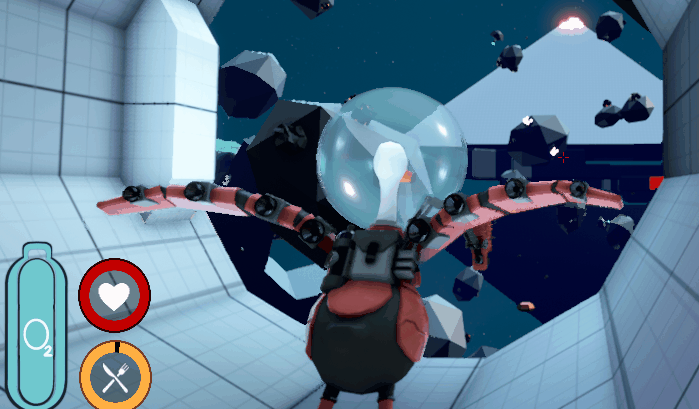
Duckside of the Moon is a space survival game where the player explores distinct environments, each with their own atmosphere and hazards. While a previous designer had set-up a way of defining different effects in blueprints, there was no good way for designers to use the effects within the world.
For this I created a visual tool to place and shape those effects in the world: The Pocket Manager and its Pockets, which are visual zones that designers could drop into the level , resize, and test out the effects (which are also color coded).
Alongside that I built a dialogue system for the narrative designers, which can be used to set dialogue per zone within the world for a specific NPC. And to finish it off a camera transition triggered trough Unreal's interaction systems when the player talks to an NPC.
Zone Effect Tool
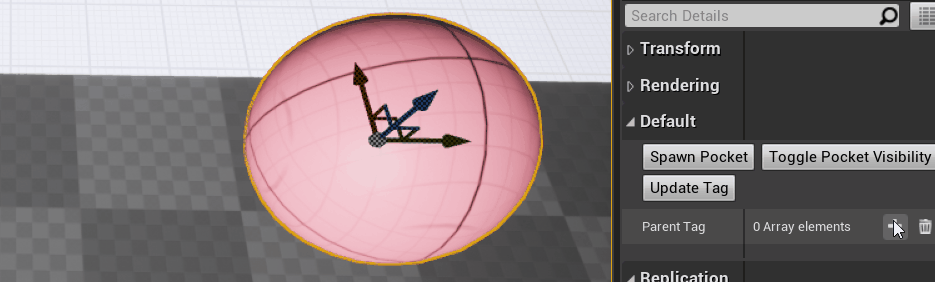
Pocket Manager & Pockets
The zone effect tool was created using blueprints, and was used to give designers control over gameplay zones with effects (e.g. frost, radiation, oxygen). This enables fast iteration of the level design. The system consists of Pocket Managers that manage Pockets (zones) with customizable behaviour.
The Pocket Manager sits in the level and acts as a parent, from which designers can spawn Pockets, update the effect of the Pockets, and toggle their visibility (when testing the game).
Each Pocket is the actual hazard zone. It can be freely scaled, toggled between a cube or sphere shape, and is color coded per effect so designers can instantly see what's going on in a busy level. It also features a toggle for VFX for visual feedback.
Pocket Manager features
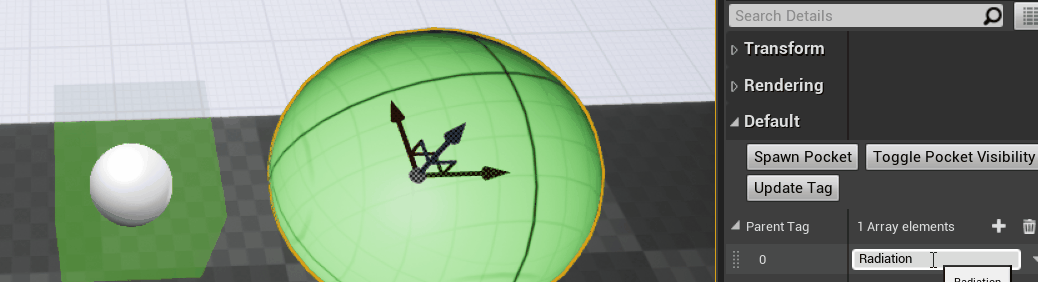
Spawn Pocket: When spawning a pocket, it and the manager will change color, depending on the effect (color for each effect could be set in blueprints). Different colors for the effects was for the designers to better differentiate between effects in the level. In this case "Radiation" turns the Pocket Manager and the pocket just spawned green.
Updating Effects: Effects can be updated on the manager. To give designers more flexibility, if they would want to change the effect in an area they had already set up.
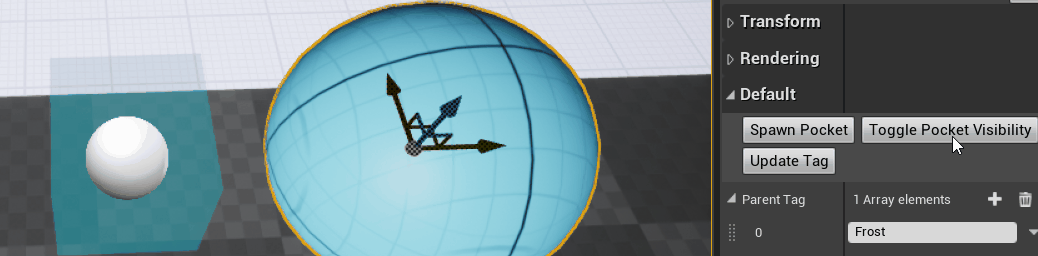
Visibility Control: Visibility can be toggled on or off for pockets, when clicking the "Toggle Pocket Visibility" button. If designers left this on they could see the areas in-game, but since the player shouldn't see them they could turn it off once they were happy with how they set up an area for an effect. This was only the case in-engine. The release build had them all turned off automatically.
Pocket features
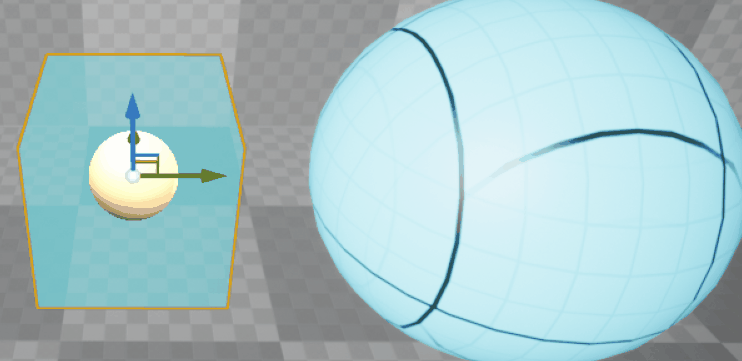
Shape Toggle example: Toggling pockets between sphere and cube form. For designers it was important to have these shapes be available for the areas within the world.

Scalable: Each pocket is scalable to their desired size.

Visual Feedback: Designers can toggle on/off VFX. This effect is then visible when the player gets in a zone.
Result
Players goes into a zone as indicated by VFX. Player also loses health because of "Radiation" effect.
Dialogue Management Tool
Designers needed a way to set-up dialogue for a specific environment within the level. For this I created a custom data table. It features the NPC ID, the conversation, which line in the conversation, the dialogue, and the zone it takes place in.
Zone-based Dialogue Creation

Dialogue Data Table: I created a data table for the narrative designer, where the dialogue could be created. The game did not feature branching dialogue, just linear dialogue, so this was good enough at the time for what the narrative designer wanted to achieve.
NPC: this is the ID for each NPC.
Conversation: This is the ID for the conversation for the NPC.
Line: This is the line ID. A Conversation can have multiple lines.
Dialogue: This is the dialogue.
Location: This is the location each line is spoken in.
Each Conversation would go trough each Line, until it had none left and increase the conversation ID.
Until there was none left for the specific location.
NPC set-up

NPC Location: On the NPC you could choose the location of where it was at this moment. It would then play the conversations created for that location when you would walk up to it.
Result

Different dialogue at different locations
Dialogue Camera Transition
I Implemented a camera transition for NPC Dialogue, ensuring smooth visual focus and enhancing player immersion. I used Unreal's interaction system to trigger dialogue, when interacting with NPC's. This will also trigger the camera transition.

Dialogue Transitions in-game